Resource guide · Installation
How to Replace a Vent Cover
A practical, illustrated sequence for replacing a wall or ceiling vent cover after you confirm the opening type and measured size. This is general homeowner guidance — not a substitute for professional repair when ducts or structure are damaged.
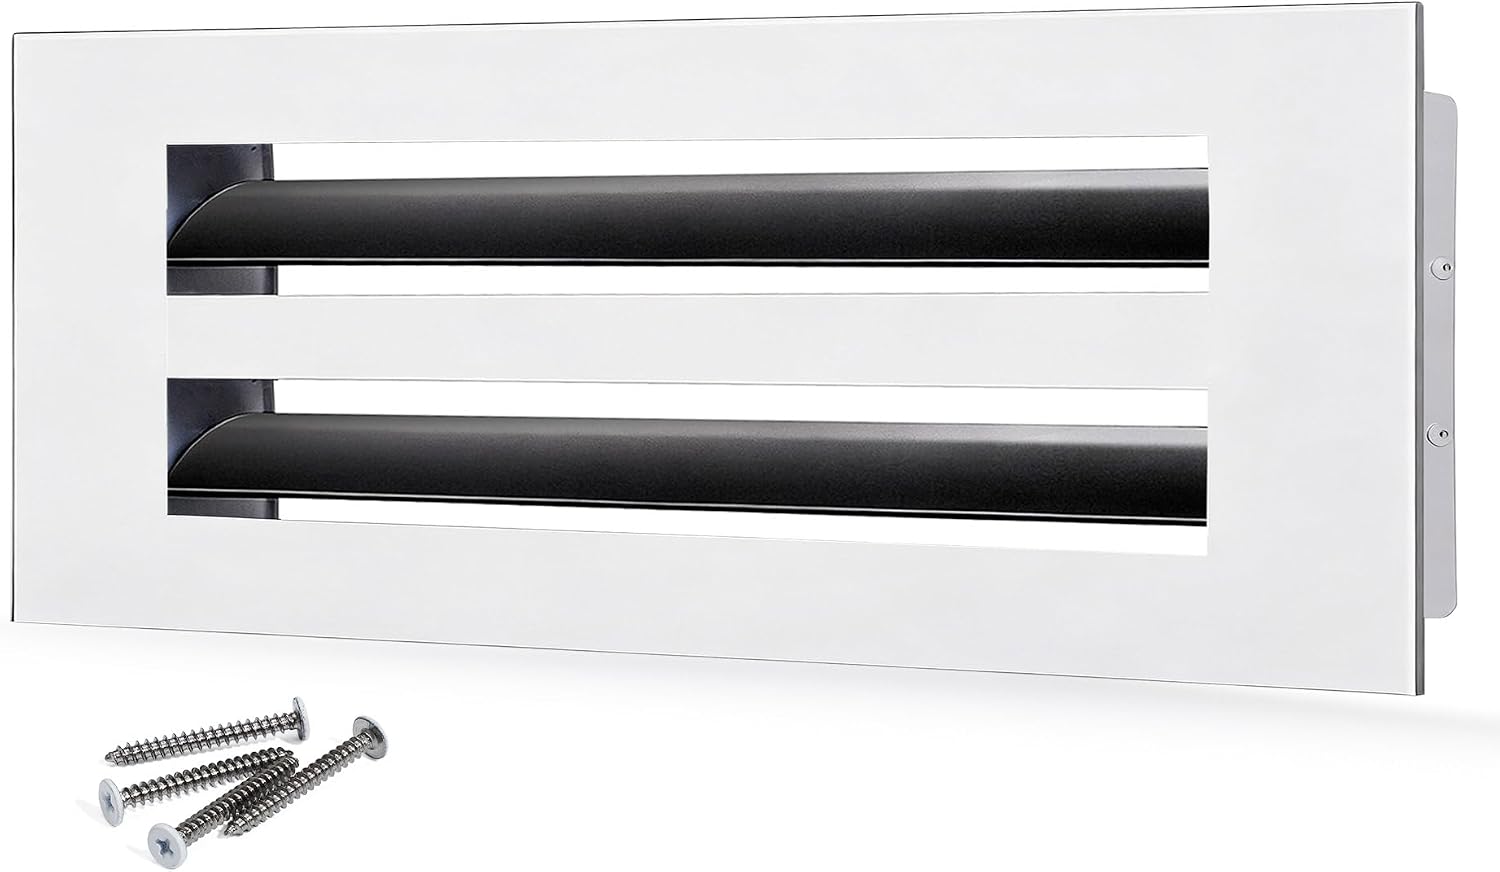
Quick Answer
Replacing a cover is the same practical job as installing a new face on an existing opening:
measure → match size → remove the old cover safely → dry-fit → fasten (see Steps 1–8 below).
Measure the opening first, match a catalog size, support the old cover while removing fasteners, dry-fit the new face, then fasten evenly without crushing the finish. Ceiling work needs extra support. If the opening is damaged or the configuration is unclear, stop and get help.
- Identify supply vs return before you shop.
- Use verified How-to-Measure imagery for opening dimensions.
- Only Confirmed SOKNOCKK sizes are shown as product examples below.
Before You Start
Gather what you actually need. Do not assume screws, filters, or mounting kits are included with a cover unless a specific listing says so — SOKNOCKK’s public catalog today is cover Size+Color combinations, not a separate accessory shelf.
Turn the system off if you will leave the duct open for more than a short moment, or if dust and tools could fall inside. Use a stable ladder for ceiling work. If you cannot reach the opening safely with both hands free for support and fastening, this is not a good DIY moment.
Tools / materials checklist
- Tape measure (opening width and height)
- Screwdriver matching existing fasteners (often Phillips)
- Small container for screws
- Stable step stool / ladder for ceiling work
- Optional: flashlight for opening inspection
- Optional: painter’s tape to hold a temporary note with measurements
Information to have ready
- Opening width × height
- Wall vs ceiling location
- Supply vs return identification
- Desired finish (White or Black)
- Photo of the opening if asking for help
- Old cover label size (supporting clue only — not the final authority)
Step 1 — Identify the Existing Vent Type
Before buying a replacement, know what the opening does. Supply openings deliver conditioned air; return openings pull air back. Wall and ceiling locations change how you support the cover during removal. Read the comparison guide if needed: Supply Vent vs Return Vent.
Identification mistakes create shopping mistakes. A homeowner who assumes “big grille = return” without checking airflow can still measure correctly and order the wrong style of face for the path. Likewise, someone who only cares about color can miss that a restrictive face on a return path is a comfort risk.
Checks
- Airflow direction with system on
- Wall vs ceiling
- Whether the old face looks like a directional register or a more open grille
- Whether a filter is nearby (supporting clue only)
Step 2 — Measure the Duct Opening
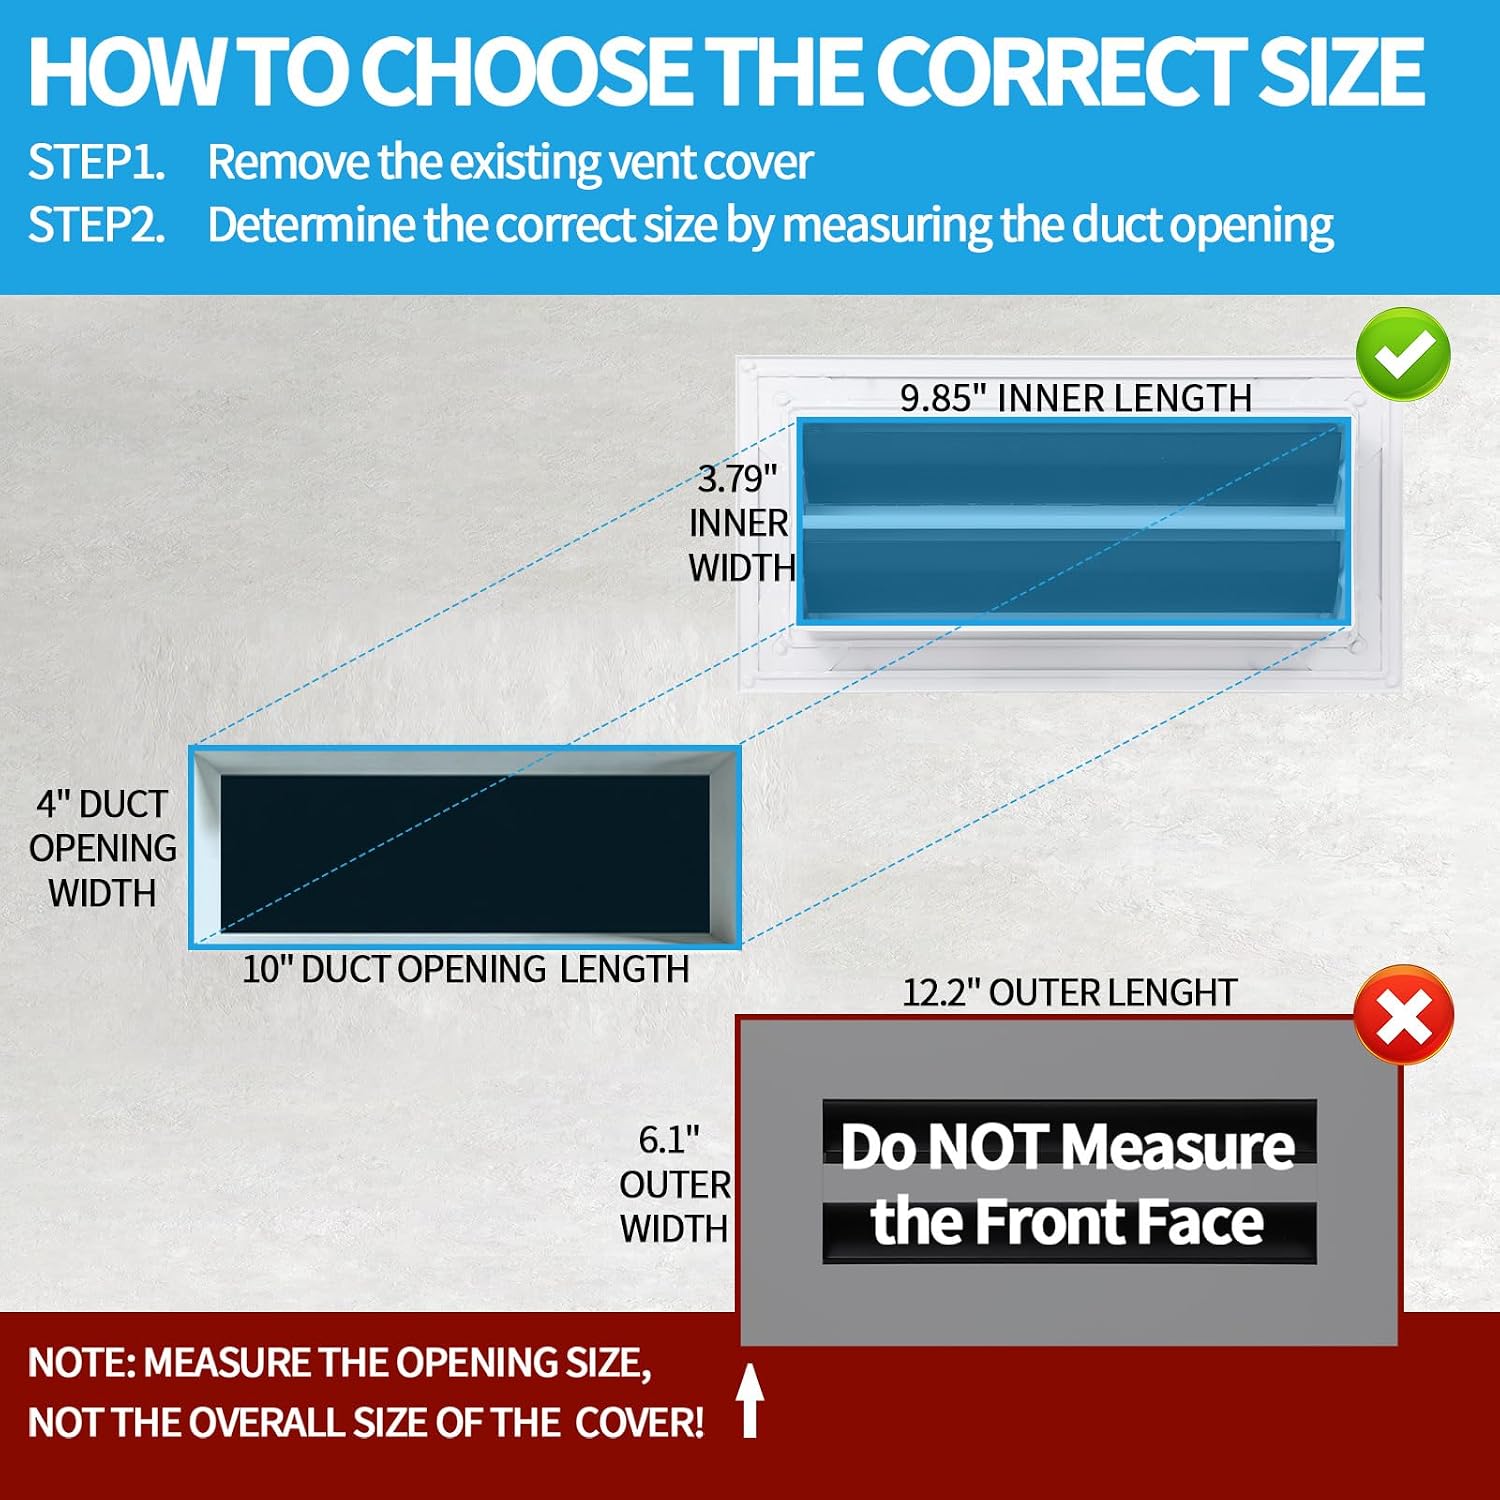
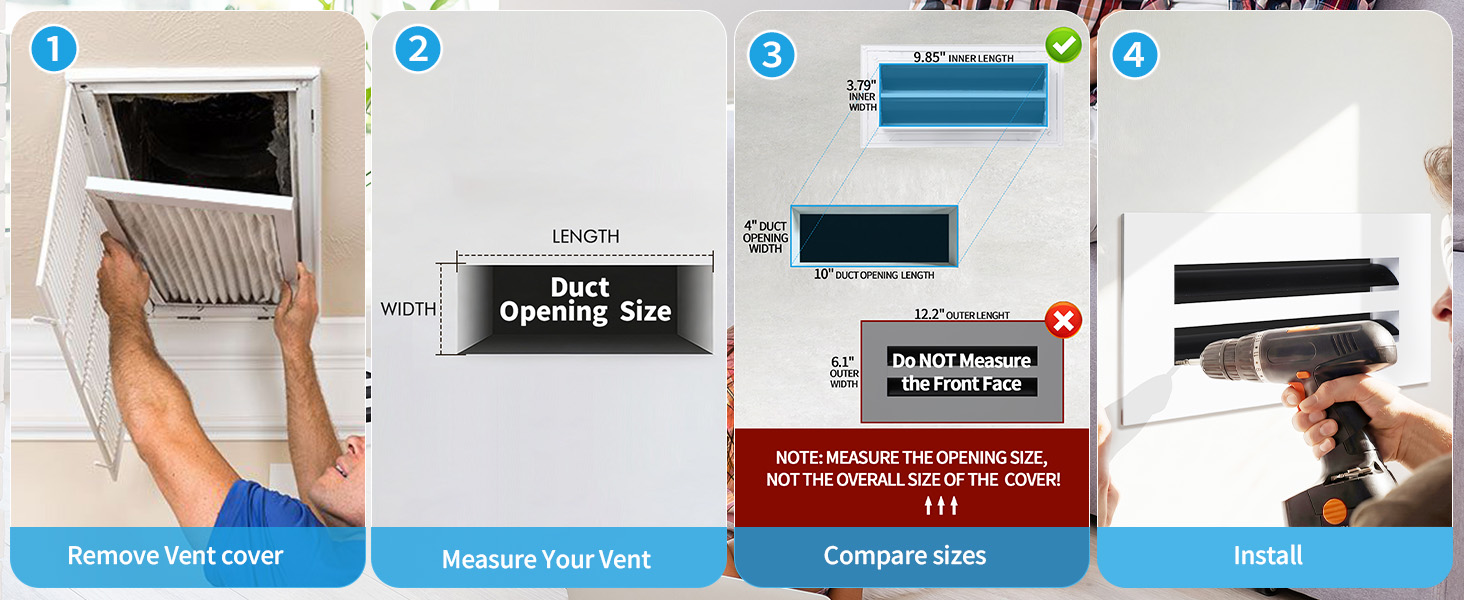
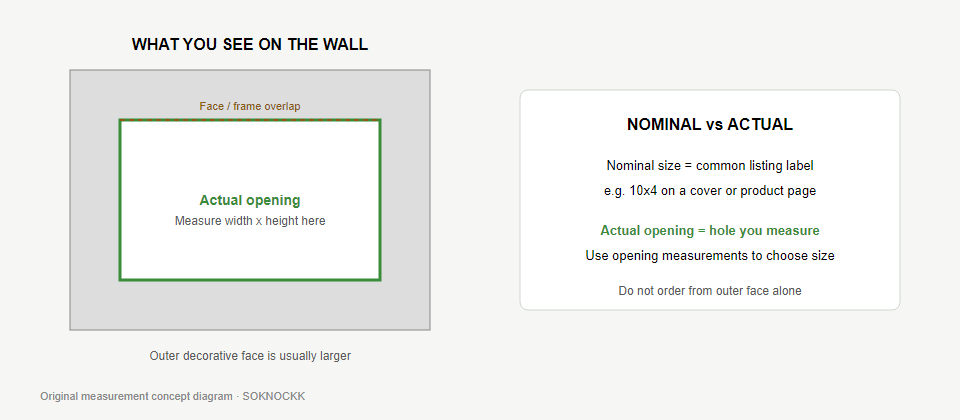
This is the highest-leverage step. Measure the opening, not only the outer decorative face. Record width and height. Then relate those numbers to nominal catalog sizes.
Write the numbers down immediately. Many replacement errors happen between the ladder and the shopping tab: people remember a rounded label from the old cover and ignore the tape reading. If the old cover is still installed, remove it when safe, or carefully measure the clear opening behind the face rather than the outer frame.
SOKNOCKK maintains size-specific How-to-Measure assets for Confirmed catalog sizes. The examples below are verified production assets used on product detail experiences — the same measurement idea applies even if your opening matches a different size family.
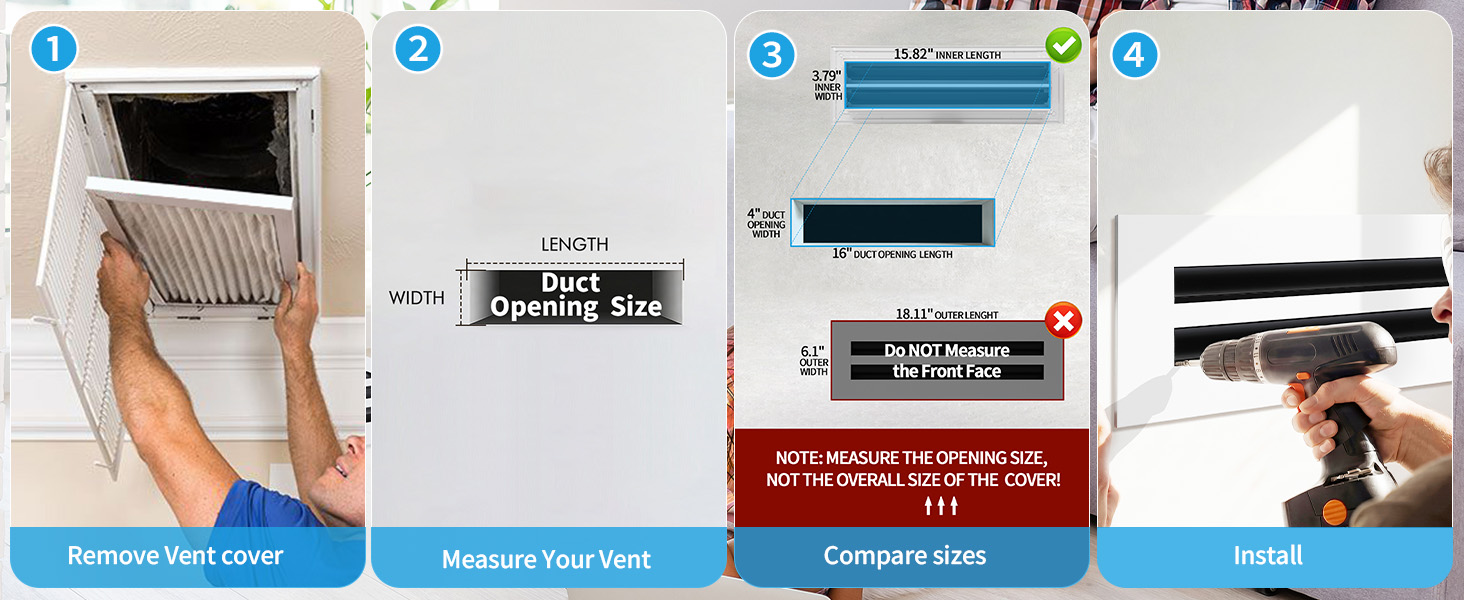
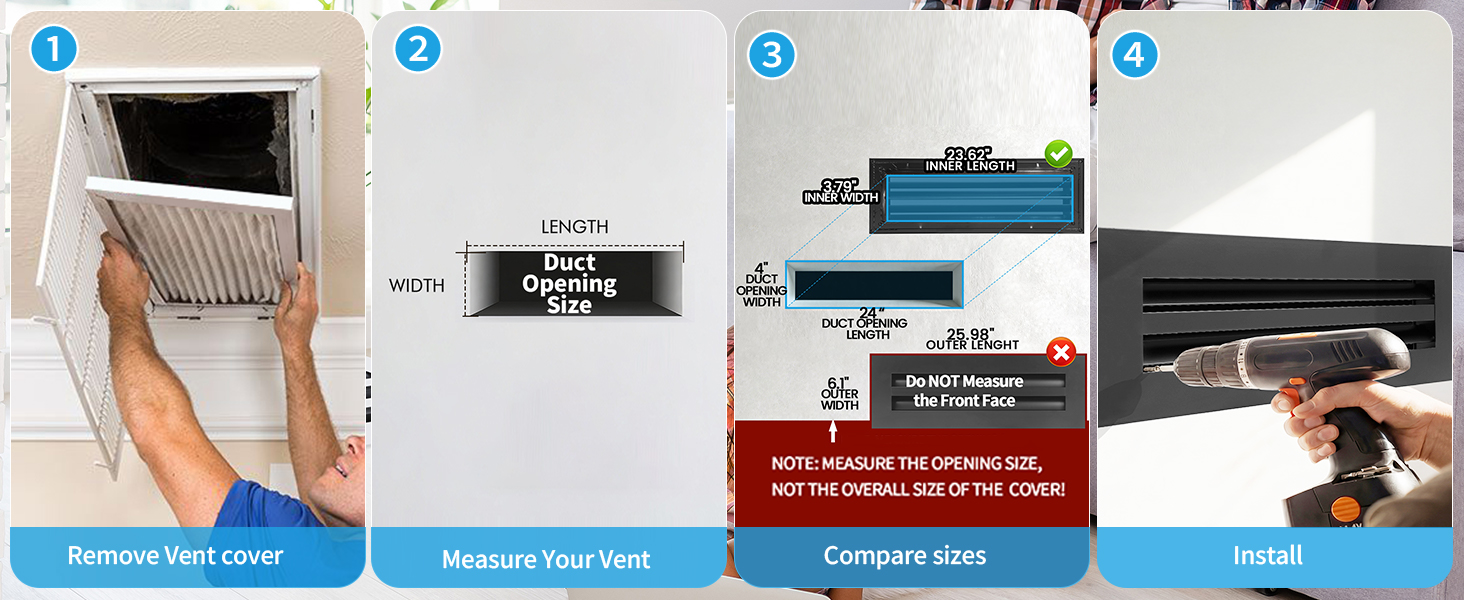
Deep links:
This guide does not publish unverified “plus/minus” fit tolerances. If your opening falls between catalog sizes or is irregular, contact SOKNOCKK with measurements and a photo rather than forcing a mismatch.
Step 3 — Check the New Cover Size
Compare your opening measurements with Confirmed catalog sizes. Size and color are selected independently on SOKNOCKK product pages. Confirmed combinations continue to Amazon for checkout where mapped.
What should match is the relationship between your measured opening and the catalog size family you select — not a guess from the old outer frame. Use product photography and How-to-Measure assets on the product page as confirmation that you are looking at the intended size family.
Pending Size+Color combinations are intentionally excluded from this guide’s product examples. Only Confirmed public items are shown below.
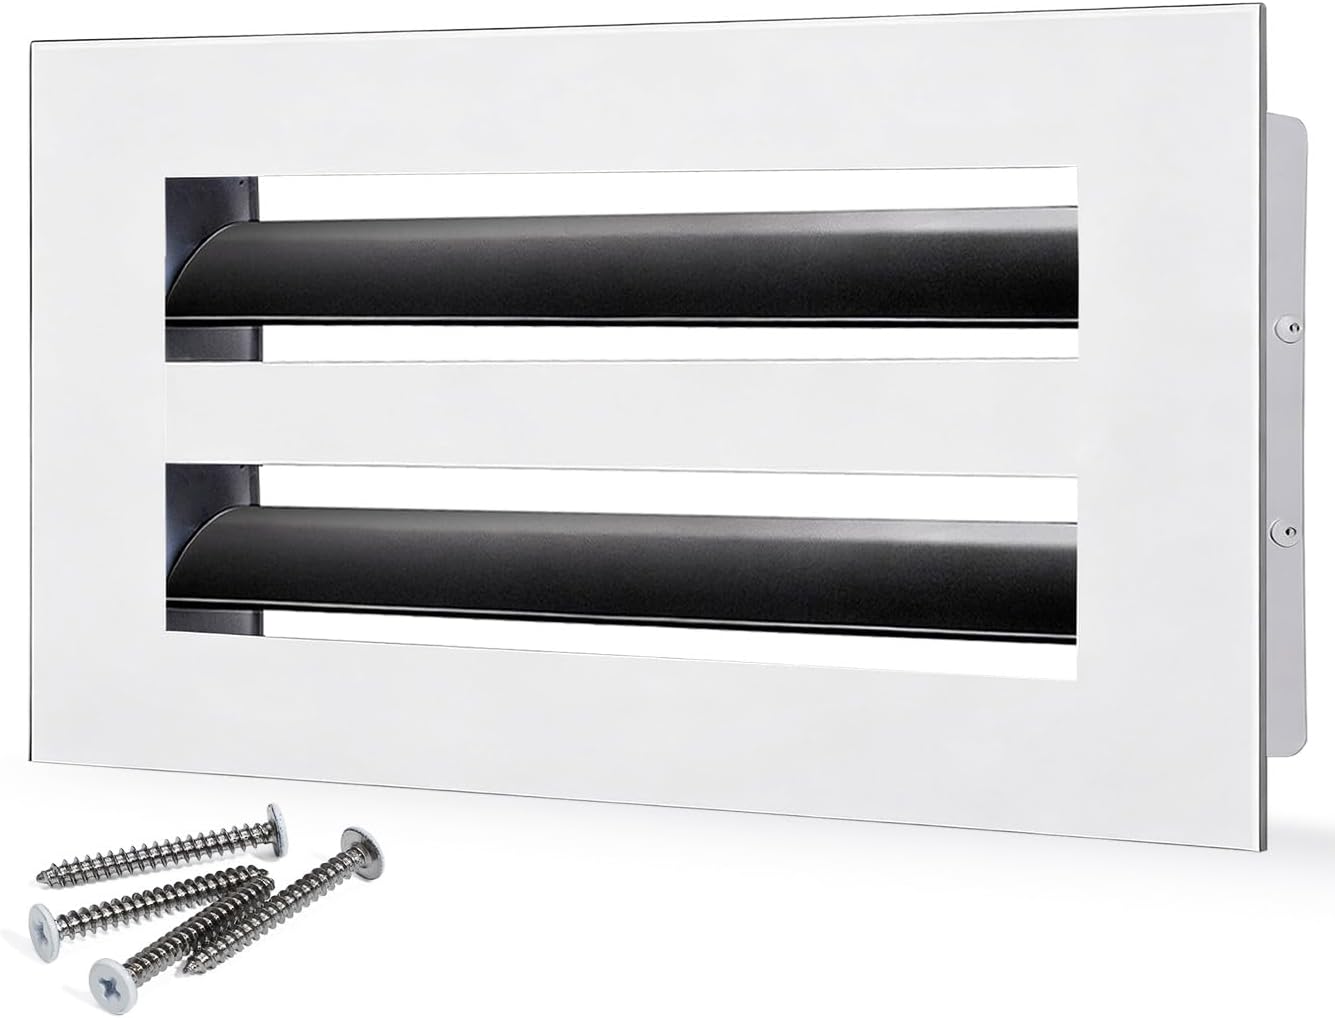

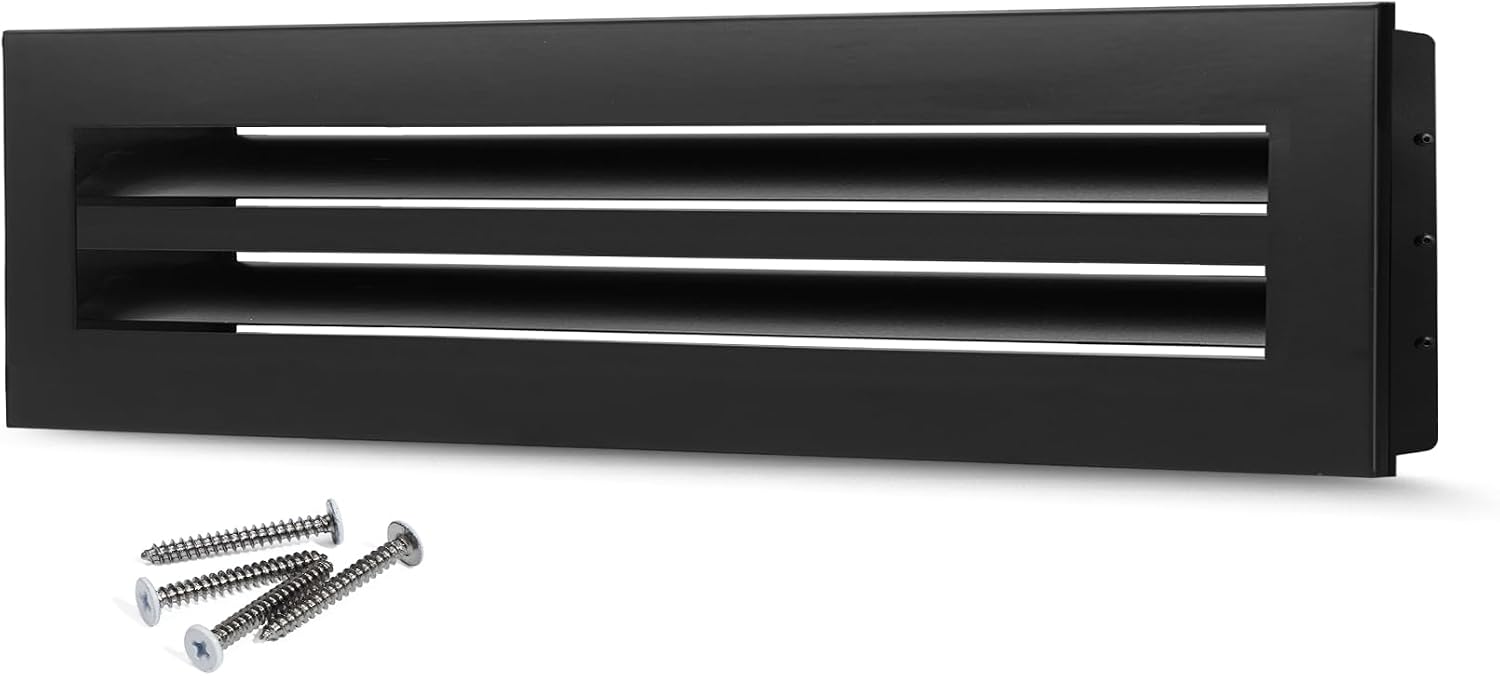
Browse the full grid: Vent Covers. For finish logic, see Choose Size and Color Independently.
Step 4 — Remove the Existing Cover Safely
Support the cover — especially on ceilings — before the last fasteners loosen. Keep screws in a container. Avoid dropping tools or fasteners into the duct.
Work in a controlled order: support the face with one hand, loosen fasteners gradually, and do not remove the final screw until you are ready to carry the cover’s weight. On ceilings, a second person can make this dramatically safer. If paint has sealed the face to the finish, score carefully around the perimeter rather than prying hard against drywall.
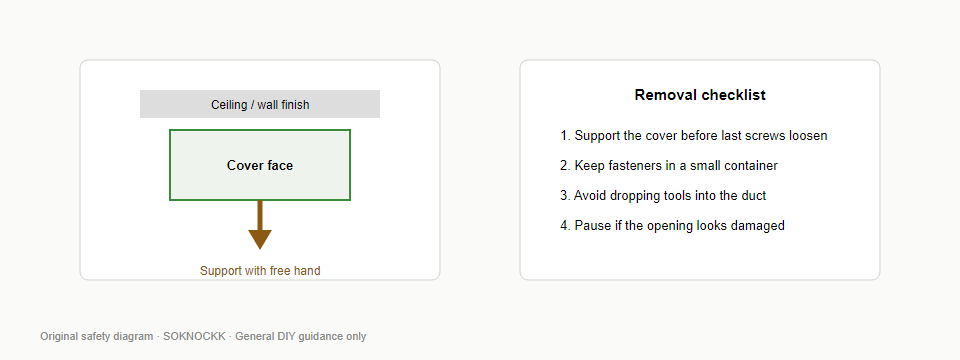
A dropping cover can injure or damage finishes. If you cannot safely support and reach the fasteners, stop.
Step 5 — Inspect the Opening
With the old cover off, look for issues that affect fit or safety. A clean rectangular opening with sound edges is the easy case. Real houses are messier: paint ridges, compressed insulation, slightly ovalized boots, or crumbling screw pockets are common.
- Debris or insulation blocking the path
- Bent duct edges
- Crumbled drywall around screw locations
- Missing or stripped anchors
- Sharp metal edges that could cut during handling
This is an inspection step, not a structural repair manual. Significant damage is a stop point. DOE duct materials likewise steer homeowners toward qualified help for duct repairs rather than improvising major duct changes.
Step 6 — Dry-Fit the Replacement
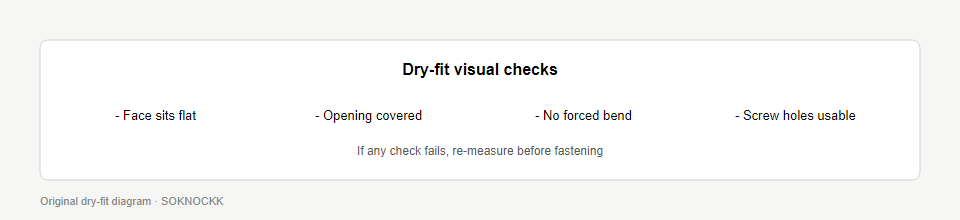
Place the new cover without forcing it. Confirm the face sits flat, covers the opening cleanly, and does not require bending metal or drywall to “make it work.”
Dry-fit is your last cheap chance to catch a sizing error. If the cover only sits flat when you push hard on one corner, stop. If screw holes are nowhere near usable anchors, stop and reassess rather than creating uncontrolled new holes in weakened finish.
Step 7 — Fasten Correctly
Align fastener holes with sound anchors when possible. Start all screws loosely, then snug evenly. Do not overtighten into drywall or plaster. There are no torque specs invented here — “firm and even” is the practical target for typical residential finishes.
Uneven fastening is a common cause of warped-looking faces and corner gaps. If one screw bottoms out early, back off and check whether the cover is cocked against a high spot on the finish or a bent duct lip.

Step 8 — Restore Airflow and Inspect
Restore system power if you turned it off. Confirm the cover remains stable with airflow. Listen/feel for obvious rattle from a loose face. Recheck that screws did not back out.
For supply openings, you should feel delivery into the room. For return openings, you should feel pull without an obviously choked face. If something feels dramatically different from the old cover in a worrying way, reassess free area and fit rather than ignoring it.
Common Fit Problems
| Problem | Possible reason | What to check |
|---|---|---|
| Cover too large | Ordered from outer face size | Re-measure opening; compare nominal vs actual guide |
| Cover too small | Wrong catalog size / misread tape | Re-measure both axes; confirm units |
| Screw holes don’t align | Different face pattern / damaged anchors | Inspect opening; do not force new holes casually |
| Cover not sitting flat | Bent duct lip / uneven drywall | Inspect edges; stop if structural |
| Unexpected opening size | Old label disagreed with hole | Trust the opening measurement |
| Airflow / noise concern after install | Restriction, loose face, debris | Confirm path clear; reassess free area on returns |
Wall vs Ceiling Installation
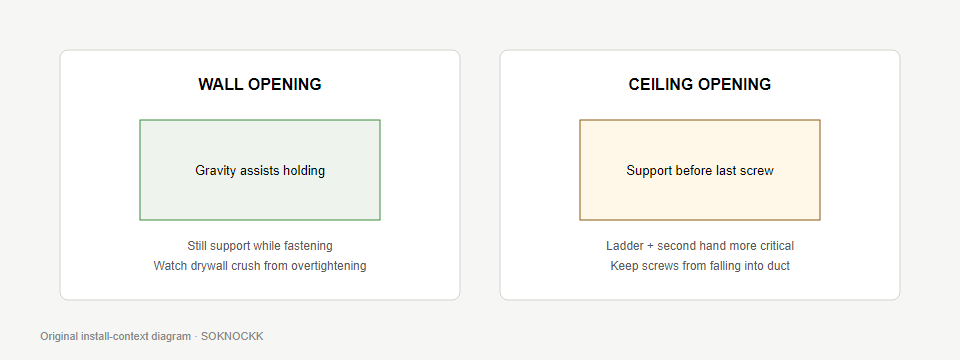
Ceiling work raises the cost of a dropped cover and makes fastener control harder. Wall work is often simpler but still suffers if you overtighten into soft finishes.
Wall tips
- Support still matters on the last screw
- Watch for crumbling paint ridges that keep the face from sitting flat
- Do not overtighten into soft drywall pockets
Ceiling tips
- Use a stable ladder and keep both hands planned
- Contain screws so none fall into the duct
- Consider a helper for larger faces
When Not to DIY
- Major duct damage, disconnected ducts, or active leaks into unconditioned space
- Electrical issues near the opening
- Significant structural / drywall failure around the opening
- Uncertain HVAC configuration where changing free area could matter
In those cases, document with photos and involve a qualified local professional. DOE duct guidance likewise points homeowners toward qualified help for duct repairs and combustion-safety-sensitive changes.
Replacement Checklist
FAQ
Do I need new screws?
Often the existing fasteners can be reused if they are sound. This guide does not claim screws are included with every cover.
What if my opening is between two catalog sizes?
Do not invent a midpoint product. Contact SOKNOCKK with measurements and photos, or reassess whether the opening geometry was read correctly.
Can I replace a return cover with any decorative face?
Fit alone is not enough. Consider free area and restriction risk. See the Supply vs Return guide.
Where do Confirmed sizes purchase?
Confirmed Size+Color combinations use the mapped Amazon purchase path. See Confirmed Sizes Purchase on Amazon.
Is there a size chart page?
Use the Vent Covers catalog filters for live Confirmed sizes. A dedicated public size-chart page is not asserted here if not already published.
What tools do I need to replace (or install) a vent cover?
Use the Tools / materials checklist in Before You Start on this page
(tape measure, matching screwdriver, screw container, stable step stool/ladder for ceiling work; optional flashlight and painter’s tape).
Tools do not fix a wrong size — measure the opening first (Step 2).
SOKNOCKK’s public catalog is Size+Color covers; do not assume screws or mounting kits are included unless a specific listing says so.
Is installing a new cover different from replacing one?
The dry-fit and fastening steps are the same. “Replace” means an old face is already present.
Always measure the clear opening — do not copy the outer frame size of the old grille alone.
Should I turn the HVAC off first?
Turn the system off if the duct will stay open more than a moment, or if dust/tools could fall inside.
When unsure, power off. Ceiling work still needs free-hand support before the last fastener loosens (Step 4).